Mastering How to Make Sourdough Starter: Your Ultimate Guide
how to make sourdough starter

Mastering How to Make Sourdough Starter: Your Ultimate Guide

Embark on a rewarding culinary journey to create your own vibrant sourdough starter, the heart of artisanal bread.

Start Your Starter Today!

Key Takeaways

  • ✓ Sourdough starter is a living culture of wild yeast and bacteria.
  • ✓ It typically takes 5-7 days to create a robust, active starter.
  • ✓ Only flour and water are needed to begin your starter.
  • ✓ Consistency and proper feeding are crucial for success.

How It Works

1
Combine Flour & Water (Day 1)

Mix equal parts whole wheat flour and water in a jar. This initiates fermentation by introducing natural yeasts and bacteria.

2
Daily Feeding & Observation (Days 2-6)

Discard most of the starter and feed the remainder with fresh flour and water. Observe for bubbles, sour smell, and rise.

3
Maturity & Activity (Day 7+)

Your starter is ready when it consistently doubles in size within 4-8 hours after feeding. It should smell pleasantly sour and yeasty.

4
Maintain & Use

Once active, maintain your starter with regular feedings at room temperature or store it in the refrigerator for less frequent feeding.

Understanding the Magic: What is Sourdough Starter?

High angle of unrecognizable woman cutting dough on cutting board on table in kitchen Photo: Klaus Nielsen / Pexels
Before we dive into the practical steps of how to make sourdough starter, it's essential to grasp the fundamental science behind it. A sourdough starter isn't just a simple mix of flour and water; it's a living, breathing ecosystem, a symbiotic colony of wild yeasts and lactic acid bacteria (LAB) that exist naturally in flour and the air around us. These microorganisms are responsible for the unique flavor, texture, and rise of sourdough bread. Unlike commercial yeast, which is a single strain of *Saccharomyces cerevisiae*, a sourdough starter contains a diverse community of microbes. This diversity is what gives sourdough its complex, tangy flavor profile and its ability to break down gluten and phytic acid, potentially making the bread more digestible and nutritious. When you combine flour and water, you're essentially providing a food source and a hydration medium for these latent microbes. The wild yeasts consume the sugars in the flour, producing carbon dioxide gas (which creates the bubbles and makes the bread rise) and alcohol. Simultaneously, the lactic acid bacteria ferment sugars into lactic acid and acetic acid. These acids contribute significantly to the characteristic sour taste of sourdough and also act as natural preservatives, extending the shelf life of the bread. The balance between these yeasts and bacteria, influenced by factors like temperature, hydration, and the type of flour used, determines the overall health and activity of your starter. Creating a starter is a journey of cultivation. You're not just mixing ingredients; you're nurturing a microbial culture. This process can be incredibly rewarding, offering a deeper connection to your food and a profound understanding of fermentation. Each starter develops its own unique characteristics, often influenced by its environment, making every sourdough loaf a reflection of its origin. Patience is key in this process. You're waiting for these microorganisms to establish a strong, active community. It's a testament to nature's incredible power and a reminder that some of the best culinary creations come from the simplest ingredients and a bit of time. Understanding this microbial dance is the first step towards successfully creating and maintaining a vibrant sourdough starter that will serve as the foundation for countless delicious loaves of bread. Learning about the different types of flour can significantly impact your starter's development; for more on this, check out our guide on choosing the best flour for baking.

Gathering Your Essential Tools and Ingredients
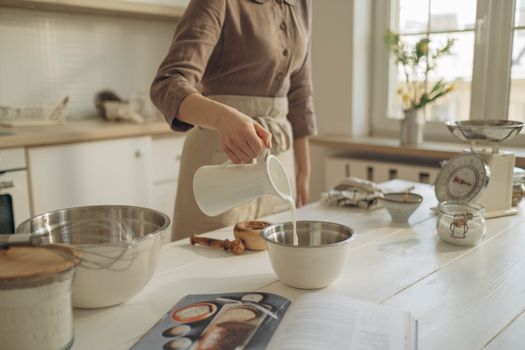
A person pours milk into a bowl, preparing ingredients on a kitchen island for baking. Photo: Ron Lach / Pexels
Embarking on the journey of how to make sourdough starter requires surprisingly few items, but the quality and type of these essentials can significantly impact your success. Let's break down what you'll need and why. First and foremost, you'll need flour. While any flour can technically be used, whole wheat flour is highly recommended for initiating your starter. Why? Whole wheat flour contains a higher concentration of nutrients and, crucially, a greater abundance of wild yeasts and bacteria present on the bran. This jumpstarts the fermentation process much more effectively than refined white flour. Once your starter is established, you can transition to all-purpose or bread flour for subsequent feedings, but starting with whole wheat gives it a strong foundation. Organic flour is often preferred by many bakers as it is less likely to contain residues that might inhibit microbial growth. Some even experiment with rye flour, known for its robust microbial activity and distinct flavor. Next, water is critical. Tap water is generally fine for most people in the US, but if your tap water is heavily chlorinated, it can be detrimental to the delicate microorganisms in your starter. Chlorine is a disinfectant, and it will kill the very yeasts and bacteria you're trying to cultivate. If you suspect your water has high chlorine levels, simply leave it out in an open container overnight; the chlorine will dissipate. Alternatively, use filtered or bottled spring water. Avoid distilled water as it lacks the minerals that can contribute to a healthy starter. For containers, a clean glass jar with a wide mouth is ideal. Mason jars, old pickle jars, or even a large glass measuring cup work perfectly. The wide mouth makes it easy to stir and feed your starter. Avoid using metal containers for long-term storage or mixing as some metals can react with the acids in the starter. A breathable cover is also essential. This allows air to circulate, which the yeasts need, while preventing dust and unwanted contaminants from entering. A loose-fitting lid, a piece of cloth secured with a rubber band, or even plastic wrap poked with a few holes will suffice. Never seal your starter in an airtight container, especially during its active fermentation phase, as pressure can build up. Finally, you'll need a non-metal spoon or spatula for mixing and a kitchen scale. A kitchen scale is not optional; it's absolutely crucial for accurate measurements. Sourdough baking relies on precise ratios, and measuring by weight (grams) is far more accurate than measuring by volume (cups). This consistency in feeding is paramount to developing a strong, reliable starter. With these simple yet vital tools and ingredients, you'll be well-equipped to embark on your sourdough journey.

The Day-by-Day Process of Cultivating Your Starter
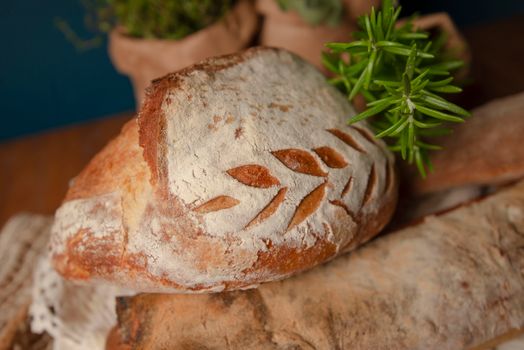
Close-up of artisan bread with a leaf design, accompanied by fresh rosemary sprigs. Photo: Natalia Olivera / Pexels
Now, let's get to the heart of how to make sourdough starter: the day-by-day feeding and observation process. This methodical approach ensures your starter develops into a vigorous, reliable leavening agent. Remember, consistency and patience are your best friends here. **Day 1: The Inaugural Mix.** In a clean glass jar, combine 50 grams of whole wheat flour with 50 grams of water. Mix thoroughly until there are no dry spots. The consistency should be like a thick batter. Cover loosely and place it in a warm spot (ideally 70-75°F or 21-24°C) away from direct sunlight. This initial mixture kickstarts the fermentation by providing the first meal for the naturally occurring microbes. **Day 2: First Signs of Life?** You might not see much activity yet, and that's perfectly normal. The microbes are just beginning to wake up and multiply. There's no feeding on Day 2. Simply stir your starter, cover it, and return it to its warm spot. Observe for any tiny bubbles or a slightly sour smell. **Day 3: The First Feed.** By now, you should start seeing some small bubbles, and it might have a slightly acidic or yeasty smell. It's time for the first discard and feed. Discard all but 50 grams of your starter. To the remaining 50 grams, add 50 grams of fresh whole wheat flour and 50 grams of water. Mix well, cover, and return to its warm spot. Discarding is crucial as it removes excess acid and provides fresh food, preventing the starter from becoming too acidic and sluggish. **Day 4-6: Building Strength.** Continue the discard and feed routine daily. Each day, discard all but 50 grams of starter, then feed with 50 grams whole wheat flour and 50 grams water. You should notice increasing activity: more bubbles, a more pronounced rise and fall, and a more pleasant, yeasty-sour aroma. The starter might develop a thin, dark liquid on top called 'hooch.' This is a sign of hunger; simply pour it off before feeding. If your starter seems very active, you can switch to a half whole wheat, half all-purpose flour mix for feeding, or even all all-purpose flour. The goal is to develop a strong, consistent rise and fall, ideally doubling in size within 6-12 hours after feeding. Consistency in feeding time (e.g., every 24 hours) is important. For more advanced tips on maintaining your starter, consider exploring resources on advanced bread-making techniques. **Day 7 and Beyond: Maturity.** Your starter is likely ready when it consistently doubles in size within 4-8 hours after feeding and has a pleasant, tangy, yeasty aroma. It should have a web-like structure when stirred and be full of bubbles. At this point, you can transition to an all-purpose or bread flour for feeding if you wish. Once active, you can keep it at room temperature, feeding it daily, or store it in the refrigerator, feeding it once a week. Congratulations, you've successfully learned how to make sourdough starter!

Troubleshooting Common Issues & Maintaining a Healthy Starter
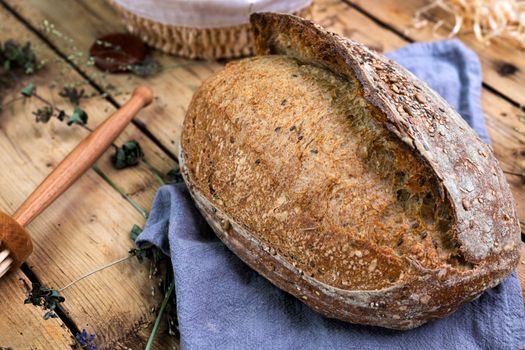
Freshly baked sourdough bread with seeds on a rustic wooden table setting. Photo: Jana Ohajdova / Pexels
Even with the best intentions, your sourdough starter might throw you a curveball. Knowing how to troubleshoot common issues and maintain a healthy, vibrant starter is crucial for long-term success in your sourdough journey. **Sluggish or Inactive Starter:** If your starter isn't bubbling or rising consistently, several factors could be at play. The most common culprit is temperature; if your kitchen is too cold, the microbes will slow down. Try moving your starter to a warmer spot, like on top of the refrigerator, inside a turned-off oven with the light on (be careful not to overheat!), or in a proofing box. Another reason for sluggishness can be insufficient feeding or an overly acidic environment. Ensure you're discarding enough old starter and feeding with fresh flour and water at regular intervals. A good rule of thumb is to feed when your starter has peaked and begun to fall. **Hooch (Dark Liquid on Top):** This thin, dark liquid (often grey or black) is a sign that your starter is hungry and has consumed all its available food. It's perfectly normal, especially if you've gone a bit longer between feedings. Simply pour off the hooch, stir the remaining starter, and feed as usual. If the hooch is pink or orange, or if there's any visible mold, discard the entire starter and begin anew. **Mold Growth:** Mold is the most serious issue and, unfortunately, means your starter is compromised. Mold can appear as fuzzy spots of various colors (green, black, white, pink). If you see any mold, do not try to salvage it; discard the entire starter, clean your jar thoroughly, and start over. Mold usually indicates unsanitary conditions or using contaminated flour/water. **Unpleasant Odors:** While a healthy starter should smell pleasantly sour and yeasty, very strong, acetone-like (nail polish remover) or rotten smells indicate an imbalance. This often means the starter is too acidic or has been left too long without food. Try feeding more frequently, or give it a few smaller feedings throughout the day to help rebalance the microbial community. Ensure your water is chlorine-free. **Maintaining a Healthy Starter:** * **Regular Feeding:** If kept at room temperature, feed your starter every 12-24 hours. The ratio of starter:flour:water is typically 1:1:1 (e.g., 50g starter, 50g flour, 50g water). Adjust frequency based on ambient temperature and activity. * **Refrigeration for Storage:** If you don't bake frequently, store your mature starter in the refrigerator. Feed it once a week, bringing it out, letting it warm up, feeding it, letting it become active, and then returning it to the fridge. This significantly slows down fermentation. * **Hydration:** Keep your starter at a consistent hydration level (typically 100%, meaning equal parts flour and water by weight). Changes in hydration can alter its behavior. * **Cleanliness:** Always use clean jars and utensils. While a sourdough starter is robust, preventing contamination is always a good practice. * **Observation:** Pay attention to your starter's behavior. Learn its rhythm, its smells, and how it responds to feeding. This intuition will be your most valuable tool. By understanding these common pitfalls and implementing consistent care, you'll ensure your sourdough starter remains a happy, productive member of your kitchen for years to come.

Comparison

FeatureWhole Wheat StarterAll-Purpose StarterRye Flour StarterCommercial Yeast
Initial ActivityFast & RobustSlower StartVery Fast & RobustInstant
Flavor ProfileEarthy, TangyMilder, BalancedPungent, Deep SourNeutral
Nutrient ContentHighModerateHighMinimal
MaintenanceModerateEasyModerateNo maintenance
CostLowLowLowLow

What Readers Say

"This guide on how to make sourdough starter was a game-changer! I had tried before and failed, but the detailed day-by-day instructions here made all the difference. My starter is now consistently bubbly and strong."

Sarah J. · Austin, TX

"I never thought I'd be able to make sourdough starter, but this article broke it down so simply. The troubleshooting section saved me when my starter got a little sluggish. Highly recommend for beginners!"

Mark D. · Portland, OR

"Following these steps, I successfully created a vibrant starter in just seven days! My first loaf of sourdough bread was incredibly flavorful and had a beautiful open crumb. This guide truly delivers on its promise."

Elena R. · Chicago, IL

"The information provided was excellent and very thorough. I appreciate the emphasis on using a kitchen scale. My only minor suggestion would be to add a visual timeline, but overall, a fantastic resource for making sourdough starter."

David L. · Denver, CO

"As an experienced baker, I found this guide incredibly well-researched and perfect for someone looking to start their first sourdough culture. It covers all the crucial aspects without being overwhelming, making it easy to share with friends new to baking."

Maria K. · Miami, FL

Frequently Asked Questions

What is the best flour to use when learning how to make sourdough starter?

Whole wheat flour is highly recommended for starting your sourdough culture. It contains a higher concentration of nutrients and naturally occurring wild yeasts and bacteria, which helps to kickstart the fermentation process more effectively than refined white flours. Once your starter is established and active, you can transition to all-purpose or bread flour for regular feedings.

My sourdough starter isn't bubbling. Is it dead?

Not necessarily! A lack of bubbles often means your starter is sluggish, not dead. Common reasons include a cold environment, insufficient feeding, or chlorinated water. Try moving it to a warmer spot (70-75°F), ensuring you're feeding it regularly at a 1:1:1 ratio, and using filtered or dechlorinated water. Give it a few more days of consistent care before giving up.

How often should I feed my sourdough starter?

If kept at room temperature (around 70-75°F), an active sourdough starter should be fed every 12-24 hours. The goal is to feed it when it's at its peak activity or just beginning to fall. If you store your starter in the refrigerator, you only need to feed it once a week, bringing it to room temperature and allowing it to become active before re-refrigerating.

Is it expensive to make sourdough starter?

No, making sourdough starter is incredibly inexpensive. You only need two basic ingredients: flour and water. A bag of whole wheat flour and a bottle of filtered water are typically all you need to get started, costing just a few dollars. The most significant investment is your time and patience, but the reward of homemade bread is priceless.

How does sourdough starter compare to commercial yeast?

Sourdough starter uses wild yeasts and lactic acid bacteria for leavening, resulting in a complex, tangy flavor and unique texture. Commercial yeast, on the other hand, is a single, cultivated strain of yeast that provides a quick, consistent rise and a more neutral flavor. Sourdough bread is often considered more digestible due to the fermentation process, while commercial yeast is convenient for rapid baking.

Who should try making sourdough starter?

Anyone with a passion for baking, an interest in fermentation, or a desire to create truly artisanal bread should try making sourdough starter. It's particularly rewarding for those who enjoy a hands-on approach to cooking and appreciate the unique flavors and health benefits of naturally leavened bread. Patience is a virtue for this endeavor.

Is it safe to eat sourdough bread made from a new starter?

Yes, it is generally safe to eat sourdough bread made from a new starter, provided your starter shows no signs of mold (pink, black, green fuzzy spots) or truly foul odors (like rotten meat). A healthy starter will smell pleasantly sour and yeasty. If you have any concerns, err on the side of caution and discard it. Trust your senses.

What's the future trend for sourdough starters?

The future of sourdough starters is likely to lean towards greater personalization and regionalization. Bakers are increasingly exploring different flour types (ancient grains, local varieties) to create unique starter profiles. There's also a growing interest in understanding the specific microbial communities within starters and how they impact flavor and nutrition, leading to more tailored and diverse sourdough creations.

You now possess the comprehensive knowledge to successfully embark on your sourdough journey. Take the first step and learn how to make sourdough starter today, unlocking a world of delicious, homemade bread. Your kitchen (and your taste buds) will thank you for it!

Topics: how to make sourdough startersourdough starter recipefeeding sourdough startersourdough starter carehomemade sourdough
Leo List
Brampton weed
Adultwork EstrelaBet Vai de Bet R7 Bet Betão Galera Bet Rainbet Bet9ja Shop SportyBet BetKing Sisal Loto Foot Hollywoodbets YesPlay Odibets RushBet Jugabet BetWarrior BetCity MSport betPawa Fortebet