✓ Sourdough starter is a living culture of wild yeast and bacteria.
✓ It requires only flour and water to create.
✓ The process typically takes 5-7 days to establish a robust starter.
✓ Regular feeding and maintenance are crucial for its health.
How It Works
1
Combine Flour and Water
Mix equal parts whole wheat flour and filtered water in a jar. This initial mixture kickstarts the fermentation process.
2
Daily Feeding Schedule
For several days, discard most of the starter and feed the remainder with fresh flour and water. This strengthens the wild yeast population.
3
Observe Activity and Growth
Look for consistent bubbling, a pleasant yeasty aroma, and a predictable rise and fall after feeding. These are signs of a healthy, active starter.
4
Confirm Readiness for Baking
A mature starter should reliably double in size within 4-8 hours after feeding and pass the 'float test' before being used for baking.
Understanding the Magic: What is a Sourdough Starter?
Photo: Anh Nguyen / Pexels
Before we dive into the practical steps of how to make sourdough starter from scratch, it's essential to grasp the fundamental concept of what you're actually creating. A sourdough starter isn't just a mixture of flour and water; it's a living, breathing ecosystem, a thriving community of wild yeasts and beneficial bacteria, primarily lactobacilli. These microorganisms, naturally present in flour and the air around us, are the unsung heroes responsible for the distinctive flavor, texture, and rise of sourdough bread. Unlike commercial yeast, which is a single, cultivated strain, sourdough starter offers a complex symphony of flavors, contributing a unique tanginess and a more digestible crumb to your loaves. The wild yeasts consume the sugars in the flour, producing carbon dioxide gas that leavens the bread. Simultaneously, the lactobacilli produce lactic and acetic acids, which impart sourdough's characteristic sour taste and help to preserve the bread naturally. This symbiotic relationship is what makes sourdough baking such a fascinating and rewarding endeavor. Understanding this biological process demystifies the act of 'feeding' your starter – you're quite literally nourishing these microscopic helpers. The flour provides the carbohydrates they need for energy, and the water creates the medium for their growth and activity. The ambient temperature also plays a critical role, influencing the speed at which these microorganisms reproduce and ferment. A warmer environment generally accelerates activity, while cooler temperatures slow it down. This sensitivity to temperature is why consistency in your kitchen environment can be beneficial during the initial creation phase. By providing the right conditions, you encourage the wild yeasts and bacteria to multiply and become strong enough to leaven your bread effectively. This initial investment of time and care in cultivating a robust starter is the cornerstone of successful sourdough baking. It's a journey of observation, patience, and a little bit of scientific curiosity, leading to a truly artisanal product. Learn more about the science of baking here.
Gathering Your Essential Tools and Ingredients for Sourdough Starter
Photo: Ron Lach / Pexels
Embarking on the journey of how to make sourdough starter from scratch requires minimal specialized equipment, which is part of its charm. However, having the right basic tools and high-quality ingredients will significantly contribute to your success. First, let's talk about containers. You'll need at least one, preferably two, clean, clear glass jars. Wide-mouth jars, like Mason jars, are ideal because they allow for easy stirring, feeding, and observation of your starter's activity. A capacity of at least 16-24 ounces (approximately 500-700ml) is recommended to accommodate the starter's growth. Avoid using metal containers for long-term storage or mixing, as some metals can react with the acids in the starter, though stainless steel is generally acceptable for short-term contact. Next, you'll need a non-metal stirring utensil, such as a wooden spoon or a silicone spatula. These are gentle on glass jars and won't introduce unwanted reactions. A kitchen scale that can measure in grams is an absolute must. Precision is key in sourdough baking, and measuring by weight (especially flour and water) ensures consistent results, unlike volume measurements which can vary widely. For covering your jar, use a breathable material like a coffee filter, cheesecloth, or a loose-fitting lid (not airtight). This allows air to circulate while preventing unwanted contaminants from entering. Now, for the ingredients: flour and water. The type of flour you choose for your initial starter can have a significant impact. Whole wheat flour is often recommended for the first few days because its bran contains a higher concentration of wild yeasts and nutrients, which helps to kickstart fermentation more effectively. Organic whole wheat flour can be even better, as it's less likely to contain residues that might inhibit microbial growth. After the initial boost, you can transition to unbleached all-purpose flour or bread flour for subsequent feedings. Avoid bleached flours, as the bleaching process can destroy beneficial microorganisms. As for water, filtered, unchlorinated water is crucial. Chlorine, present in most tap water, is a disinfectant designed to kill microorganisms, which is precisely what you don't want when trying to cultivate a living culture. If you don't have a filter, you can leave tap water out in an open container for 24 hours, allowing the chlorine to dissipate. Room temperature water is also preferred, as extreme cold or heat can shock the starter. Having these simple but essential items ready will set you up for a smooth and successful starter creation process, paving the way for countless delicious loaves of sourdough bread.
The Day-by-Day Process: Cultivating Your Wild Yeast Starter
Photo: Willfried Wende / Pexels
Now for the exciting part: the step-by-step guide on how to make sourdough starter from scratch. This process typically takes about 5-7 days, though it can sometimes take longer depending on your environment and ingredients. Patience and observation are your best tools here.
**Day 1: The Inaugural Mix**
In your clean glass jar, combine 50 grams (approximately ¼ cup) of whole wheat flour with 50 grams (approximately ¼ cup) of room temperature filtered water. Mix thoroughly with a non-metal utensil until there are no dry spots. The consistency should be like a thick paste or batter. Scrape down the sides of the jar, cover loosely with a breathable lid (like cheesecloth or a coffee filter secured with a rubber band), and place it in a warm spot in your kitchen, ideally between 70-78°F (21-25°C). Avoid direct sunlight or cold drafts. Label the jar with the date.
**Day 2: Initial Observation**
By day two, you might not see much activity, or you might notice a few small bubbles. This is normal. The wild yeasts are just starting to wake up and multiply. Don't feed it today; simply give it a stir and return it to its warm spot. You might detect a faint, slightly sour, or even cheesy smell – these are all signs that microorganisms are beginning their work.
**Day 3: The First Feed**
Today, you should start seeing more activity – perhaps more bubbles, a slight rise, and a more distinct, sour aroma. It might smell like acetone or nail polish remover, which is a common sign of hungry wild yeasts. It’s time for the first feed! Discard about two-thirds of your starter, leaving approximately 50 grams in the jar. To this, add 50 grams of whole wheat flour and 50 grams of filtered water. Mix well until smooth. Cover loosely and return to its warm spot. Discarding starter is crucial as it removes excess acid and provides fresh food for the remaining, stronger microbes.
**Day 4 & 5: Building Strength**
Continue the feeding routine from Day 3. Each day, discard two-thirds of the starter, then feed with 50g flour (you can start transitioning to unbleached all-purpose flour now, or continue with whole wheat for a few more days if you prefer) and 50g filtered water. You should observe increasing activity: more consistent bubbles, a noticeable rise after feeding (it might double in size), and a more pleasant, yeasty, slightly sour aroma. The acetone smell should dissipate as the starter becomes more balanced. It's a good idea to mark the level of your starter after feeding with a rubber band on the outside of the jar, so you can easily track its rise.
**Day 6 & 7: Maturation and Readiness**
By now, your starter should be reliably doubling in size within 4-8 hours after feeding, showing a strong bubbly structure, and smelling pleasantly yeasty and sour, like ripe fruit or good yogurt. It should feel light and airy. To confirm readiness, perform the 'float test': drop a small spoonful of starter into a glass of room temperature water. If it floats, it's ready to bake with! If it sinks, it needs more time and possibly another day or two of consistent feeding. Once your starter is consistently passing the float test and showing predictable activity, it is considered mature and ready for baking. Congratulations, you've successfully learned how to make sourdough starter from scratch! Now you can move on to maintaining it or baking your first loaf.
Troubleshooting Common Issues and Maintaining Your Sourdough Starter
Photo: Lidya Kohen / Pexels
Even with the best intentions, creating a sourdough starter can sometimes present challenges. Knowing how to troubleshoot common issues and establish a good maintenance routine is vital for its long-term health.
**Common Issues and Solutions:**
* **No Activity/Slow Activity:** If your starter isn't bubbling or rising, several factors could be at play. The most common is a cool kitchen environment. Try moving your starter to a warmer spot (75-80°F is ideal). Ensure you're using filtered, unchlorinated water. Sometimes, a higher ratio of whole wheat flour in the initial days can give it a boost. Also, ensure you are discarding enough; too much old, acidic starter can inhibit new growth. Consistent, regular feeding is key.
* **Foul Smell (Rotten, Cheesy, or Vomit-like):** While a slight acetone smell is normal in young, hungry starters, truly foul odors indicate undesirable bacteria might be dominating. This often happens if the starter isn't fed frequently enough or is kept too warm without enough food. Try discarding more aggressively (leaving only a tablespoon or two) and feeding with fresh, high-quality whole wheat flour and water at a 1:1:1 ratio (starter:flour:water). Ensure your jar is clean. If the smell persists for more than a day or two, it might be best to start over.
* **Mold Growth:** Any visible mold (fuzzy, colored spots – black, green, pink, or orange) means your starter is contaminated and cannot be saved. Discard it immediately and thoroughly clean your jar and utensils before starting fresh. Mold is usually caused by airborne spores or unclean equipment.
* **Liquid Separation ('Hooch'):** A dark liquid forming on top of your starter, known as 'hooch,' is a sign of a very hungry starter. A light layer of clear or pale brown hooch is perfectly normal and can simply be stirred back in or poured off before feeding. Dark or black hooch indicates extreme hunger and potentially an unhealthy starter. To remedy this, feed more frequently or increase the feeding ratio (e.g., 1:2:2 starter:flour:water). This is a common issue when maintaining a starter in the fridge.
**Maintaining Your Healthy Starter:**
Once your starter is mature and active, you have two primary options for maintenance:
1. **Room Temperature (Daily Feeding):** If you bake frequently (every day or two), you can keep your starter on the countertop and feed it daily. The standard ratio is 1:1:1 (starter:flour:water). For example, keep 50g starter, feed with 50g flour, and 50g water. This keeps it vigorous and ready to use at a moment's notice.
2. **Refrigerator Storage (Weekly Feeding):** For less frequent bakers (once a week or less), storing your starter in the refrigerator is the most practical method. After feeding your mature starter, let it sit on the counter for 1-2 hours until it starts to show signs of activity (small bubbles), then place it in the fridge. The cold temperature significantly slows down microbial activity. When you want to bake, take it out, let it come to room temperature, and feed it once or twice (every 12-24 hours) until it's active and passes the float test again. This 'waking up' process usually takes 1-2 days. Don't forget to feed your refrigerated starter at least once a week, even if you're not baking. Before feeding, discard all but a small amount (e.g., 20-30g) to prevent it from becoming too voluminous or too acidic. Always feed it before returning it to the fridge. Consistent care and observation will ensure your sourdough starter remains a vibrant and reliable baking companion for years to come.
Comparison
Feature
Best Option
Alternative 1
Alternative 2
Flour Type (Initial)
Organic Whole Wheat
Regular Whole Wheat
Unbleached All-Purpose
Water Type
Filtered Water
Bottled Spring Water
Boiled/Cooled Tap Water
Container
Wide-Mouth Glass Jar
Plastic Container (BPA-free)
Ceramic Crock
Cover Type
Breathable Cloth/Lid
Loose-Fitting Lid
Plastic Wrap (vented)
What Readers Say
★★★★★
"This guide made learning how to make sourdough starter from scratch so approachable! My starter, 'Bubbles,' is now thriving, and I've already made two delicious loaves."
Sarah J. · Portland, OR
★★★★★
"I was intimidated by sourdough, but these clear, step-by-step instructions gave me the confidence. My starter is consistently active and smells amazing, just as described."
Mark D. · Austin, TX
★★★★★
"Following this detailed article, I successfully created a robust sourdough starter in just 6 days. My first loaf had an incredible open crumb and perfect tang – truly a game-changer!"
Emily R. · Denver, CO
★★★★★
"Great resource for beginners. My starter took a little longer than 7 days to get really strong, but the troubleshooting tips helped me persevere. Worth the effort!"
David L. · Chicago, IL
★★★★★
"As someone who bakes gluten-free, I adapted these principles with my GF flour blend, and it worked! The instructions on how to make sourdough starter from scratch are universally helpful."
Jessica M. · Miami, FL
Frequently Asked Questions
How long does it take to make a sourdough starter from scratch?
Typically, it takes 5-7 days to create a robust and active sourdough starter from scratch. However, environmental factors like temperature and the type of flour used can influence this timeline, sometimes extending it to 10 days or more. Patience and consistent daily feeding are key to success.
What if my sourdough starter isn't bubbling or rising?
Lack of activity is a common concern. First, ensure your kitchen is warm enough (70-78°F is ideal). Also, check that you are using filtered, unchlorinated water and good quality flour. Sometimes, feeding more frequently or increasing the ratio of fresh flour and water can give it a boost. Don't give up after a few days!
How often should I feed my sourdough starter?
During the initial creation phase, you should feed your starter daily after the first 48 hours. Once mature, if kept at room temperature, feed it every 12-24 hours. If stored in the refrigerator, feed it at least once a week to keep it healthy and active, bringing it to room temperature before feeding.
Is making a sourdough starter expensive?
No, making a sourdough starter is incredibly cost-effective. The primary ingredients are just flour and water, which are very inexpensive. The only other 'cost' is a glass jar and a kitchen scale, which are often one-time purchases for many kitchen endeavors. It's a budget-friendly way to elevate your baking.
How is a sourdough starter different from commercial yeast?
A sourdough starter is a wild culture of naturally occurring yeasts and bacteria, creating complex flavors and unique textures. Commercial yeast, conversely, is a single, cultivated strain of yeast, offering a more predictable but less nuanced rise. Sourdough bread is also often easier to digest due to the fermentation process.
Who should try making a sourdough starter?
Anyone with a passion for baking, an interest in natural fermentation, or a desire to create artisanal bread at home should try making a sourdough starter. It's a rewarding process that connects you more deeply with your food and offers endless creative possibilities in the kitchen.
Is there any risk of contamination or making my starter unsafe?
The main risk is mold growth, which appears as fuzzy, colored spots. If you see any mold, discard the starter immediately and start fresh. Foul, rotten smells also indicate a problem. However, a healthy, active sourdough starter, with its acidic environment, is generally self-preserving and safe to use. Always use clean jars and utensils.
What are the future trends in sourdough baking?
Future trends in sourdough baking include exploring ancient grains, experimenting with diverse flours for unique flavor profiles, and integrating sourdough starters into a wider range of culinary applications beyond just bread, such as pancakes, pizza, and even desserts. Personalizing starter maintenance and sharing custom strains are also growing trends.
Now that you know how to make sourdough starter from scratch, it's time to embark on your own baking adventure. Cultivating your own starter is a rewarding journey that promises delicious, wholesome bread. Don't hesitate – gather your ingredients and start today!

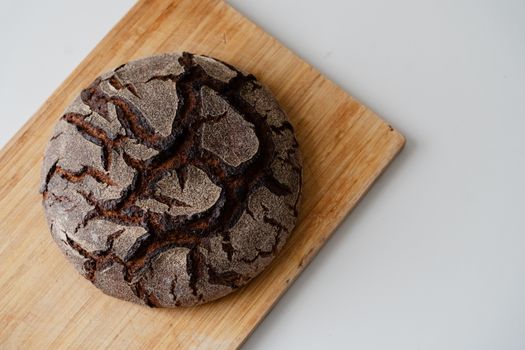 Photo: Anh Nguyen / Pexels
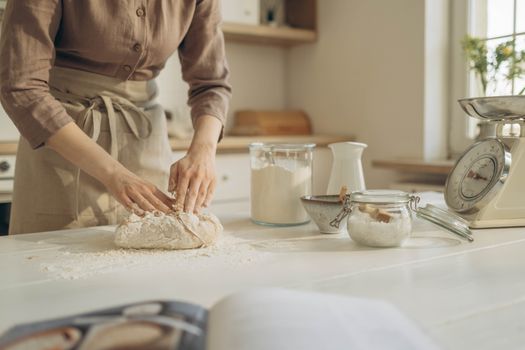 Photo: Ron Lach / Pexels
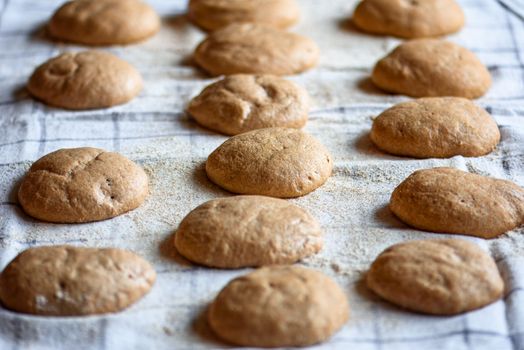 Photo: Willfried Wende / Pexels
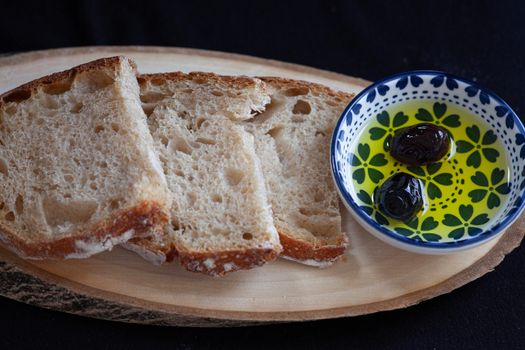 Photo: Lidya Kohen / Pexels