Master how to make homemade pizza dough from scratch
homemade pizza dough

Master how to make homemade pizza dough from scratch

Transform your kitchen into a pizzeria with our ultimate guide to creating unbelievably delicious, homemade pizza dough from scratch.

Start Baking Now

Key Takeaways

  • ✓ Only 4-5 basic ingredients are needed for classic pizza dough.
  • ✓ The secret to great dough is proper hydration and kneading.
  • ✓ Cold fermentation significantly enhances flavor and texture.
  • ✓ Homemade dough offers superior taste and customization compared to store-bought.

How It Works

1
Gather Your Ingredients

Ensure you have high-quality flour, active yeast, warm water, salt, and olive oil. Accurate measurements are crucial for success.

2
Mix and Knead the Dough

Combine wet and dry ingredients, then knead until a smooth, elastic dough forms. This develops the gluten structure for a chewy crust.

3
First Rise (Bulk Fermentation)

Allow the dough to rise in a warm place until doubled in size. This step activates the yeast and develops flavor.

4
Shape and Bake Your Pizza

Gently shape the dough, add your favorite toppings, and bake at a high temperature. Enjoy the fruits of your labor with a perfectly crispy crust.

Understanding the Fundamentals of Pizza Dough Ingredients
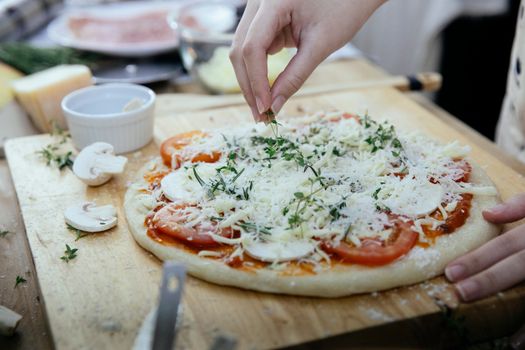
Unrecognizable female cook putting fresh greens on uncooked pizza with sliced tomatoes and mushrooms topped with grated cheese while cooking against blurred background Photo: Katerina Holmes / Pexels
Embarking on the journey of how to make homemade pizza dough from scratch begins with a deep appreciation for its humble yet mighty ingredients. Each component plays a crucial role in the final texture, flavor, and rise of your crust. Let's break down the essentials: flour, water, yeast, salt, and olive oil. **Flour:** This is the backbone of your pizza dough. While all-purpose flour can work, for a truly exceptional crust, consider using bread flour or Italian '00' flour. Bread flour has a higher protein content (typically 12-14%), which translates to more gluten development, leading to a chewier, more elastic dough that can withstand stretching without tearing. Italian '00' flour is finely milled and has a moderate protein content, ideal for creating a crisp yet tender crust, often favored for Neapolitan-style pizzas. Avoid using cake flour or pastry flour, as their low protein content will result in a weak, crumbly dough. The quality and type of flour significantly impact the dough's hydration, so be prepared to adjust water slightly based on your chosen flour. Learn more about different flour types for baking. **Water:** Often overlooked, water is critical. It activates the yeast, hydrates the flour, and helps form the gluten structure. The temperature of the water is paramount; aim for lukewarm water (around 105-115°F or 40-46°C) to optimally activate active dry yeast. Water that's too hot will kill the yeast, while water that's too cold won't activate it effectively, leading to a sluggish rise. Using filtered water can also make a subtle difference, as chlorine in tap water can sometimes inhibit yeast activity. The ratio of water to flour (hydration level) dictates the dough's texture – higher hydration leads to a more open, airy crumb, while lower hydration results in a denser crust. **Yeast:** The magical leavening agent that gives your pizza its airy, bubbly structure. Most home recipes call for active dry yeast or instant yeast. Active dry yeast needs to be 'proofed' in warm water with a pinch of sugar to ensure it's alive and active before combining with other ingredients. Instant yeast, on the other hand, can be mixed directly with the dry ingredients as it doesn't require prior activation. Both types work effectively, but instant yeast generally offers a slightly faster rise. Store yeast in an airtight container in the refrigerator or freezer to prolong its shelf life and potency. Expired or inactive yeast is a common culprit for dough that doesn't rise. **Salt:** More than just a seasoning, salt plays several vital roles in pizza dough. It enhances the flavor of the crust, balances the sweetness produced by yeast activity, and, crucially, controls the rate of yeast fermentation. Without salt, yeast can become overactive, leading to an overly gassy dough with a less developed flavor. However, too much salt can inhibit yeast activity entirely. Fine sea salt or kosher salt are excellent choices, as they dissolve easily and distribute evenly throughout the dough. Avoid iodized table salt, which can sometimes impart an off-flavor. **Olive Oil:** A small amount of extra virgin olive oil contributes to the dough's elasticity, makes it easier to handle, and adds a subtle richness and tenderness to the final crust. It also helps achieve a beautiful golden-brown color during baking. While optional for some very traditional Neapolitan styles, a drizzle of good quality olive oil is a welcome addition to most homemade pizza dough recipes, enhancing both texture and flavor. These five ingredients, when combined correctly, lay the foundation for a truly spectacular homemade pizza experience, making the process of how to make homemade pizza dough from scratch a rewarding culinary adventure.

The Art of Mixing and Kneading for Perfect Pizza Dough
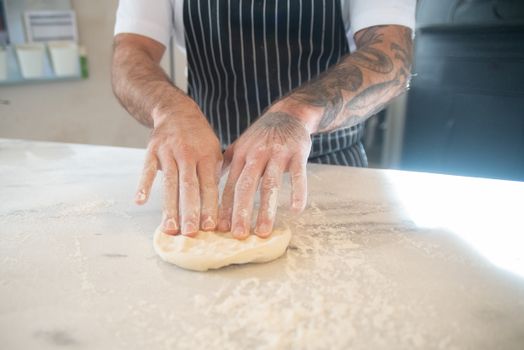
A chef with tattoos kneads dough on a floured surface in a kitchen setting. Photo: Kampus Production / Pexels
Once your high-quality ingredients are assembled, the next critical phase in how to make homemade pizza dough from scratch is the mixing and kneading process. This is where the magic happens, transforming disparate ingredients into a cohesive, elastic dough ready for fermentation. Whether you opt for a stand mixer or the traditional hand-kneading method, understanding the principles remains the same. **Mixing the Ingredients:** Begin by combining your wet ingredients (warm water, yeast, and a pinch of sugar if proofing active dry yeast) in a large bowl. Let this sit for 5-10 minutes until foamy, indicating the yeast is active. In a separate, larger bowl, whisk together the flour and salt. Create a well in the center of the dry ingredients and pour in the activated yeast mixture and the olive oil. Using a wooden spoon or your hands, gradually incorporate the flour into the wet ingredients until a shaggy, somewhat sticky dough forms. At this stage, resist the urge to add too much extra flour, as the dough will become less sticky as gluten develops during kneading. The initial mixing is about bringing everything together, ensuring all the flour is hydrated. **Kneading by Hand:** This is a therapeutic and rewarding method, connecting you directly with your food. Turn the shaggy dough out onto a lightly floured surface. Begin by pushing the dough away from you with the heels of your hands, then folding it back over itself. Rotate the dough a quarter turn and repeat. The key is to stretch and fold, stretch and fold. Initially, the dough will be sticky and tear easily. As you continue to knead, typically for 8-12 minutes, the gluten strands will begin to align and strengthen. The dough will become smoother, more elastic, and less sticky, and it will spring back when gently poked. A good test for readiness is the 'windowpane test': pinch a small piece of dough and gently stretch it. If you can stretch it thin enough to see light through it without tearing, the gluten is well-developed. **Kneading with a Stand Mixer:** For those who prefer a less labor-intensive approach, a stand mixer fitted with a dough hook is an excellent tool. Combine all ingredients in the mixer bowl. Start on low speed to bring the ingredients together, then increase to medium-low speed. Let the mixer do the work for 8-10 minutes. Keep an eye on the dough; it should gather around the hook and pull cleanly from the sides of the bowl. The dough should look smooth and elastic. Over-kneading can toughen the dough, so watch for the signs of readiness – a smooth, supple texture. Regardless of the method, proper kneading is essential for developing the gluten network, which traps the gases produced by the yeast, creating that desirable open, airy crumb and chewy crust. This foundational step is arguably the most crucial for achieving a professional-quality crust when you make homemade pizza dough from scratch.

Mastering Fermentation: The Secret to Flavorful Pizza Dough

Close-up of two flavorful pizzas with fresh toppings on a wooden table. Photo: ROMAN ODINTSOV / Pexels
The fermentation process is where your pizza dough truly comes alive, developing its complex flavors and characteristic airy texture. Understanding and mastering this stage is paramount for anyone learning how to make homemade pizza dough from scratch. Fermentation happens in two main phases: bulk fermentation (the first rise) and proofing (the second rise, often after shaping). **Bulk Fermentation (First Rise):** After kneading, form your dough into a smooth ball and place it in a lightly oiled large bowl, turning it once to coat. Cover the bowl tightly with plastic wrap or a damp kitchen towel to prevent it from drying out. The ideal environment for the first rise is a warm, draft-free place, typically around 75-80°F (24-27°C). A turned-off oven with the light on, or simply a warm spot on your counter, works well. The dough needs to rise until it has roughly doubled in size, which can take anywhere from 1 to 2 hours, depending on the ambient temperature and the activity of your yeast. This initial rise allows the yeast to feast on sugars in the flour, producing carbon dioxide gas (which creates bubbles) and alcohol (which contributes to flavor). Don't rush this step; patience is rewarded with a more flavorful and pliable dough. Explore different fermentation techniques for advanced baking. **Cold Fermentation (Optional, but Highly Recommended):** For truly superior flavor and texture, consider incorporating a cold fermentation step. After the initial 30-60 minutes of the first rise at room temperature, punch down the dough gently, reshape it into a ball, and place it back in the oiled bowl. Cover tightly and transfer it to the refrigerator for at least 24 hours, and up to 3-5 days. The cold temperature significantly slows down yeast activity but allows enzymes in the dough to break down complex carbohydrates into simpler sugars, resulting in a deeper, more nuanced flavor profile. The longer, slower fermentation also strengthens the gluten structure, making the dough easier to handle and contributing to a more open, airy crumb. When you're ready to use it, remove the dough from the refrigerator about 1-2 hours before shaping to allow it to come to room temperature and relax. **Punching Down and Dividing (Degassing):** Once the dough has doubled (or after cold fermentation), gently 'punch down' the dough to release the accumulated gases. This isn't a forceful action but rather a gentle pressing to redistribute the yeast and even out the temperature. Turn the dough out onto a lightly floured surface and divide it into portions for individual pizzas. For a standard 12-inch pizza, a ball of dough weighing about 200-250 grams (7-9 ounces) is ideal. **Second Rise (Proofing):** After dividing, gently shape each portion into a tight ball. Place these dough balls on a lightly floured surface, cover them with plastic wrap or a damp towel, and let them rest at room temperature for 30-60 minutes. This second, shorter rise is called proofing, and it allows the gluten to relax, making the dough much easier to stretch and shape without tearing. It also gives the yeast one last burst of activity before baking, ensuring a light and airy crust. Proper fermentation is the cornerstone of exceptional pizza dough, transforming simple ingredients into a complex and delicious foundation for your homemade pizza.

Troubleshooting Common Pizza Dough Mistakes & Essential Baking Tips
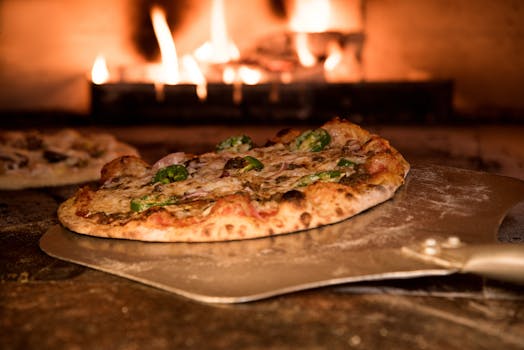
Appetizing gourmet pizza cooked in a wood-fired oven, showcasing artisanal toppings. Photo: Eneida Nieves / Pexels
Even with the best instructions, learning how to make homemade pizza dough from scratch can present challenges. Here are some common issues and crucial tips to ensure your pizza turns out perfectly every time: **Common Mistakes and How to Fix Them:** * **Dough Not Rising:** * **Problem:** Yeast is dead or inactive, water temperature was too hot or too cold, or dough wasn't in a warm enough place. * **Solution:** Always proof active dry yeast. Ensure water is 105-115°F (40-46°C). Find a consistently warm, draft-free spot for rising. Check yeast expiration dates. * **Sticky Dough:** * **Problem:** Too much water, not enough kneading, or high humidity. * **Solution:** Resist adding excessive flour during kneading; it will become less sticky. If truly too wet, add a tablespoon of flour at a time during kneading. Ensure proper kneading time to develop gluten. * **Dry, Stiff Dough:** * **Problem:** Not enough water, too much flour, or over-kneading. * **Solution:** Be precise with water measurements. Add water slowly if dough feels too dry. Avoid over-kneading; stop once smooth and elastic. * **Crust is Too Dense/Hard:** * **Problem:** Insufficient rise, too much flour, or not baked at a high enough temperature. * **Solution:** Allow full fermentation. Ensure proper hydration. Bake at the highest possible temperature your oven allows (500-550°F / 260-290°C) with a preheated pizza stone or steel. * **Crust is Soggy:** * **Problem:** Too many wet toppings, dough not baked long enough, or oven not hot enough. * **Solution:** Pre-cook high-moisture toppings. Bake on a very hot surface (stone/steel) to ensure a quick, crisp bake. Don't overload with toppings. **Essential Baking Tips for the Perfect Pizza:** * **Preheat Your Oven Thoroughly:** A hot oven is non-negotiable for a crisp crust. Preheat your oven with a pizza stone or steel for at least 45-60 minutes before baking. The stone needs to absorb and retain maximum heat. * **Use a Pizza Peel:** A lightly floured or semolina-dusted pizza peel is essential for transferring your pizza to the hot stone or steel. Practice sliding a naked dough circle off the peel a few times first. * **Don't Overload Toppings:** Less is often more. Too many toppings will weigh down the dough, make it soggy, and prevent even cooking. * **High Heat, Short Bake:** Pizza cooks best quickly at high temperatures. Aim for 5-10 minutes, depending on your oven and desired crispness. Keep an eye on it! * **Don't Forget the Olive Oil:** A drizzle of good quality extra virgin olive oil over the shaped dough before adding sauce can enhance flavor and crispness. * **Let it Rest:** Once out of the oven, let the pizza rest for a minute or two before slicing. This allows the cheese to set and prevents toppings from sliding off. Following these tips will significantly improve your success rate when you make homemade pizza dough from scratch.

Comparison

FeatureHomemade Dough (Our Recipe)Store-Bought Fresh DoughFrozen Pizza Crust
Flavor DepthExceptional, complex, customizableGood, but often less nuancedLimited, often bland
Texture ControlFull control (chewy, crispy, airy)Moderate, can be inconsistentPoor, often dense or cracker-like
Ingredient QualityFull control over premium ingredientsVariable, depends on brandOften lower quality, preservatives
Cost per PizzaVery LowModerateModerate to High
Effort LevelModerate (mixing, kneading, rising)Low (shape and bake)Very Low (top and bake)
Customization
Fermentation Benefits
Time Commitment2-24+ hours (mostly passive)30 mins prep15 mins prep

What Readers Say

"I used to buy pre-made dough, but this guide on how to make homemade pizza dough from scratch changed everything. The step-by-step instructions were so clear, and my family raves about the crust now. It's truly restaurant quality!"

Sarah J. · Austin, TX

"Making pizza from scratch seemed daunting, but this article broke it down perfectly. The cold fermentation tip for how to make homemade pizza dough from scratch made an incredible difference in flavor. My pizzas have never tasted better."

David L. · Chicago, IL

"Following this recipe for how to make homemade pizza dough from scratch, I managed to get that beautiful airy, chewy crust I've always dreamed of. My kids devoured two pizzas in one sitting, which is a huge win in our house!"

Maria P. · Miami, FL

"The guide was mostly excellent, though I found the kneading by hand took a bit longer than suggested to get the perfect elasticity. Still, the resulting dough for how to make homemade pizza dough from scratch was fantastic, a huge improvement over my previous attempts."

Tom K. · Seattle, WA

"As a gluten-free baker, I adapted some of the techniques here for my gluten-free flour blend, focusing on proper hydration and fermentation, and it truly elevated my crust. This article on how to make homemade pizza dough from scratch is a goldmine for any pizza enthusiast."

Jessica R. · Denver, CO

Frequently Asked Questions

What is the best type of flour to use for homemade pizza dough?

For the best homemade pizza dough, bread flour is highly recommended due to its higher protein content, which leads to better gluten development and a chewier crust. Italian '00' flour is also an excellent choice for a crispier, Neapolitan-style pizza. All-purpose flour can work in a pinch, but the results may be slightly less ideal.

My dough isn't rising; what went wrong?

The most common reasons for dough not rising are inactive or expired yeast, water that is too hot (killing the yeast) or too cold (not activating it), or an environment that is too cold for fermentation. Ensure your water is lukewarm (105-115°F), your yeast is fresh, and your dough is in a warm, draft-free spot.

How long should I knead pizza dough?

If kneading by hand, aim for 8-12 minutes until the dough is smooth, elastic, and springs back when gently poked. With a stand mixer and dough hook, 8-10 minutes on medium-low speed is usually sufficient. The goal is to develop the gluten structure, not just mix the ingredients.

Is making homemade pizza dough from scratch really worth the effort?

Absolutely! While it requires some time, the cost savings and significantly superior flavor, texture, and quality of homemade pizza dough are well worth the effort. You gain complete control over ingredients and can customize your crust to perfection, far surpassing store-bought options.

How does cold fermentation improve pizza dough?

Cold fermentation, or retarding the dough in the refrigerator, slows down yeast activity but allows enzymes to work longer, breaking down starches into sugars. This process develops a much deeper, more complex flavor in the dough and improves its texture, making it easier to handle and resulting in a more open, airy crumb.

Who should try to make homemade pizza dough from scratch?

Anyone who loves pizza and wants to elevate their home-cooked meals should try making pizza dough from scratch. It's particularly rewarding for home cooks looking to experiment, control ingredients, or simply enjoy the freshest, most authentic pizza possible. Even beginners can achieve great results with a good recipe and patience.

Are there any safety concerns when handling yeast or raw dough?

The primary safety concern with raw dough is consuming it, as it contains raw flour and yeast. Raw flour can contain bacteria like E. coli, and raw yeast can cause discomfort. Always ensure your dough is fully cooked. Otherwise, handling yeast and dough is very safe; just ensure proper hygiene by washing your hands before and after.

What are the future trends in homemade pizza dough?

Future trends in homemade pizza dough are leaning towards more diverse flour types (e.g., ancient grains, whole wheat blends), longer cold fermentation periods for enhanced flavor, and increased interest in sourdough pizza crusts for their unique tang and chew. Home bakers are also exploring various hydration levels for different crust styles, from ultra-thin to thick, airy pan pizzas.

Now that you're equipped with the knowledge and techniques to master how to make homemade pizza dough from scratch, there's no limit to your culinary creations. Embrace the process, experiment with flavors, and get ready to impress yourself and your loved ones with incredible, authentic homemade pizza. Your pizza journey starts here!

Topics: homemade pizza doughpizza dough recipepizza from scratchbest pizza doughyeast dough
Leo List
Brampton weed
Adultwork EstrelaBet Vai de Bet R7 Bet Betão Galera Bet Rainbet Bet9ja Shop SportyBet BetKing Sisal Loto Foot Hollywoodbets YesPlay Odibets RushBet Jugabet BetWarrior BetCity MSport betPawa Fortebet