✓ The internal temperature determines steak doneness, not cook time alone.
✓ Resting the steak after cooking is crucial for juiciness.
✓ High heat is essential for a good sear, creating a flavorful crust.
✓ Seasoning generously and simply is often the best approach.
How It Works
1
Select Your Steak
Choose a high-quality cut with good marbling. Thickness impacts cooking time and method.
2
Prepare & Season
Bring steak to room temperature, pat dry, and season generously with salt and pepper. This ensures even cooking and a great crust.
3
Sear & Cook
Use a hot pan with a high smoke point oil to achieve a deep, flavorful crust. Finish cooking to your desired internal temperature.
4
Rest & Serve
Allow the steak to rest for 5-10 minutes after cooking. This redistributes juices, ensuring a tender and moist result.
Choosing the Right Cut and Quality for Your Steak
Photo: Anna Guerrero / Pexels
The journey to mastering how to cook perfect steak at home begins long before you even turn on the stove; it starts at the butcher's counter or grocery store. The cut of meat you select plays a monumental role in the final taste, texture, and overall experience. When aiming for perfection, understanding the characteristics of different cuts is paramount.
For many, a Ribeye is the quintessential steak experience. Known for its rich marbling – those beautiful veins of fat woven throughout the meat – the Ribeye delivers unparalleled juiciness and flavor. This fat renders down during cooking, basting the meat from within and contributing to its tender texture. Another excellent choice is the New York Strip. Often leaner than a Ribeye but still well-marbled, it offers a robust beefy flavor and a satisfying chew. The Filet Mignon, cut from the tenderloin, is prized for its exceptional tenderness and mild flavor, though it has less marbling than other cuts, making it a favorite for those who prefer a less fatty steak. For a more economical yet still flavorful option, consider a Sirloin or even a Flank or Skirt steak, which are fantastic when marinated and cooked quickly over high heat, then sliced against the grain.
Beyond the specific cut, the quality of the beef itself is crucial. Look for terms like 'USDA Prime' or 'USDA Choice' in the United States. USDA Prime beef represents the highest quality, with abundant marbling, ensuring exceptional tenderness and flavor. USDA Choice is also high quality, widely available, and still delivers a fantastic eating experience. 'Select' grade beef has less marbling and can be less tender. Beyond grading, consider the source. Grass-fed beef often has a distinct, leaner flavor profile, while grain-fed beef tends to be fattier and more buttery. Ultimately, choose the best quality you can afford, as it forms the foundation of a truly perfect steak.
Thickness is another often-overlooked factor. For pan-searing and achieving a good crust without overcooking the interior, a steak that is 1 to 1.5 inches thick is ideal. Thinner steaks cook too quickly, making it difficult to control doneness, while much thicker steaks (over 2 inches) might benefit from a reverse-sear method to ensure even cooking. Always inspect the steak for even thickness to prevent one part from cooking faster than another. Your butcher can often cut a custom thickness for you. Don't be afraid to ask questions about the origin, age, and best cooking methods for the specific cuts available. A good butcher is an invaluable resource in your quest to master home cooking. Understanding these foundational elements will elevate your steak game significantly.
Mastering the Art of Seasoning and Pre-Cooking Preparation
Photo: Lukas Blazek / Pexels
Once you've selected your perfect cut, the next critical steps in how to cook perfect steak at home involve meticulous preparation and seasoning. These stages are often underestimated but are absolutely vital for achieving that coveted restaurant-quality result. The goal here is to set the stage for an incredible sear and even internal cooking.
First, and perhaps most importantly, bring your steak to room temperature. This doesn't mean leaving it out for hours, which can be unsafe. About 30-60 minutes on the counter is usually sufficient for a 1-1.5 inch thick steak. Cooking a cold steak directly from the refrigerator means the exterior will cook much faster than the interior, leading to an unevenly cooked steak – often burnt on the outside and cold in the middle. Allowing it to warm up slightly ensures a more consistent temperature gradient from edge to center, promoting even cooking.
Next, pat your steak thoroughly dry with paper towels. This step cannot be overstated. Moisture on the surface of the steak acts as a barrier, preventing the Maillard reaction – the chemical process responsible for that delicious, savory brown crust. If the surface is wet, the pan's energy will first be used to evaporate the water, essentially steaming the steak, before any browning can occur. A dry surface is crucial for a rapid, beautiful sear.
Now, for seasoning. Simplicity is often key with a great piece of beef. High-quality coarse sea salt (like kosher salt or flaky sea salt) and freshly cracked black pepper are generally all you need. Apply generously. Don't be shy! A significant amount of salt is needed to penetrate the meat and enhance its flavor. Some chefs even advocate for salting hours in advance (dry brining), which can draw out moisture, create a pellicle, and result in an even better crust, while also seasoning the meat more deeply. If you're doing this, pat it dry again right before cooking. For those who enjoy a little extra, garlic powder, onion powder, or a touch of paprika can be added, but always ensure the primary seasoning is salt and pepper.
Finally, before hitting the pan, consider a very light coating of a high smoke point oil on the steak itself, rather than just in the pan. This can help ensure even oil distribution and contribute to a more uniform crust. Once seasoned and prepped, your steak is ready for the heat, poised for an exceptional cooking experience that will leave you wondering why you ever paid restaurant prices.
Achieving the Perfect Sear and Internal Doneness
Photo: Los Muertos Crew / Pexels
The moment of truth for how to cook perfect steak at home lies in the actual cooking process: achieving that irresistible, deeply caramelized crust while ensuring the interior reaches your desired level of doneness. This requires high heat, precision, and a good understanding of temperature.
Start with the right pan. A heavy-bottomed cast iron skillet or a thick stainless steel pan is ideal because it retains heat exceptionally well, which is crucial for a consistent sear. Place your pan over high heat and let it preheat for several minutes until it's smoking lightly. This intense heat is what kickstarts the Maillard reaction, creating complex flavors and a beautiful brown crust.
Once the pan is screaming hot, add a high smoke point oil, such as grapeseed, avocado, or canola oil. Swirl to coat the bottom, then immediately place your thoroughly dried and seasoned steak in the pan. You should hear a vigorous sizzle. Do not move the steak for the first 2-3 minutes. This allows the crust to form without interruption. After this initial sear, flip the steak. Continue to cook, flipping every 1-2 minutes. This frequent flipping method, advocated by many top chefs, promotes more even cooking and can actually result in a better crust than flipping only once. As the steak cooks, consider adding aromatics like crushed garlic cloves, sprigs of fresh rosemary or thyme, and a tablespoon or two of butter to the pan. Baste the steak with this flavorful butter as it melts, using a spoon to continuously pour it over the top. This adds incredible flavor and helps create an even crust.
Monitoring internal temperature is the only reliable way to ensure perfect doneness. Invest in an instant-read meat thermometer. Insert it horizontally into the thickest part of the steak, avoiding bone or gristle. Here's a general guide for final temperatures (remember, the steak will continue to cook a few degrees after removal from heat during resting):
* **Rare:** 125-130°F (52-54°C)
* **Medium-Rare:** 130-135°F (54-57°C) – often considered the sweet spot for many cuts
* **Medium:** 135-140°F (57-60°C)
* **Medium-Well:** 140-145°F (60-63°C)
* **Well-Done:** 150°F+ (66°C+)
Pull your steak off the heat a few degrees *before* it reaches your target temperature. For example, if you're aiming for medium-rare (130-135°F), remove it at around 125-128°F. The residual heat will carry it the rest of the way, a phenomenon known as 'carryover cooking.' This precision ensures your steak is never overcooked. For thicker steaks (over 1.5 inches), or if you prefer a more hands-off approach, the reverse-sear method (starting in a low oven, then searing) is an excellent alternative that guarantees edge-to-edge doneness and a superb crust. For more detailed instructions on various cooking methods, check out our guide on advanced steak techniques. This combination of high heat searing and accurate temperature monitoring will unlock the secret to consistently perfect steaks.
The Indispensable Rest and Common Steak Cooking Mistakes
Photo: Loren Castillo / Pexels
You've chosen wisely, seasoned perfectly, and seared masterfully. Now, there's one final, absolutely critical step to truly master how to cook perfect steak at home: the rest. This often-skipped phase is what separates a good steak from an extraordinary one, ensuring every bite is as juicy and tender as possible.
**The Indispensable Rest:**
Once your steak has reached its target internal temperature and boasts a beautiful crust, immediately transfer it from the hot pan to a cutting board or a plate. Tent it loosely with aluminum foil – don't wrap it tightly, as this will steam the steak and soften the crust you worked so hard to achieve. The resting period allows the muscle fibers, which contract and squeeze out juices during cooking, to relax. As they relax, the juices, which have migrated to the center of the steak during cooking, redistribute evenly throughout the entire cut. If you slice into a steak immediately after cooking, those precious juices will spill out onto your board, leaving you with a drier, less flavorful piece of meat. The general rule of thumb is to rest for at least 5-10 minutes for a standard 1-1.5 inch thick steak. For larger cuts, you might need up to 15 minutes. This patience will be richly rewarded with a steak that is incredibly moist and tender from edge to edge.
**Common Steak Cooking Mistakes to Avoid:**
* **Not Patting the Steak Dry:** As discussed, moisture prevents a good sear. Always pat it bone-dry.
* **Not Bringing Steak to Room Temperature:** Cooking a cold steak leads to uneven doneness.
* **Using a Cold Pan or Too Little Heat:** A hot pan is crucial for the Maillard reaction and a flavorful crust. If the pan isn't hot enough, the steak will steam instead of sear.
* **Overcrowding the Pan:** If you're cooking multiple steaks, do so in batches. Overcrowding lowers the pan's temperature, leading to steaming instead of searing.
* **Flipping Too Frequently (Early Stages):** While frequent flipping later can be good, initially, let the steak sit to form a crust.
* **Cutting into the Steak to Check Doneness:** This is a cardinal sin! It releases juices and dries out the meat. Use an instant-read thermometer.
* **Not Resting the Steak:** As detailed above, this is non-negotiable for juicy results.
* **Under-Seasoning:** Don't be shy with salt and pepper. A generous hand is needed to properly flavor the meat.
* **Using Low Smoke Point Oils:** Olive oil, for example, will burn and create bitter flavors at high searing temperatures. Stick to grapeseed, avocado, or canola oil.
By avoiding these common pitfalls and embracing the simple yet vital act of resting, you'll consistently produce steaks that rival those from your favorite steakhouse, right in your own kitchen.
Comparison
Feature
Pan-Sear
Reverse Sear
Grilling
Best For Thickness
1-1.5 inches
1.5 inches+
Any (adjust time)
Crust Quality
Excellent (high heat)
Excellent (final sear)
Good (grill marks)
Evenness of Cook
Good (with practice)
Superior (edge-to-edge)
Good (can be tricky)
Equipment Needed
Cast Iron Skillet
Oven + Cast Iron
Grill (Gas/Charcoal)
Skill Level
Intermediate
Intermediate-Advanced
Intermediate
What Readers Say
★★★★★
"This guide completely changed how I cook steak at home! My ribeyes are now perfectly medium-rare with an amazing crust every single time. The tips on seasoning and resting were game-changers."
Sarah J. · Austin, TX
★★★★★
"I used to struggle with dry, unevenly cooked steaks. Following these instructions, especially the part about temperature and resting, helped me achieve how to cook perfect steak at home that's better than most restaurants."
Mark D. · Chicago, IL
★★★★★
"I followed the reverse-sear method from this guide for a thick filet mignon, and it came out flawlessly. Edge-to-edge medium-rare and so tender. My family raved about it!"
Emily R. · Seattle, WA
★★★★★
"Very comprehensive guide! My steaks have improved significantly. I still need to work on my basting technique, but the core principles of drying and resting have made a huge difference in how to cook perfect steak at home."
David L. · Miami, FL
★★★★★
"As someone new to cooking steak, this detailed guide made it feel approachable. I finally know how to cook perfect steak at home without guesswork, and the results speak for themselves."
Jessica M. · Denver, CO
Frequently Asked Questions
What's the most important step for a juicy steak?
The most important step for a juicy steak is allowing it to rest adequately after cooking. During cooking, muscle fibers contract and push juices to the center. Resting allows these fibers to relax and the juices to redistribute throughout the entire steak, ensuring every bite is moist and flavorful. Skipping this step results in dry steak with juices pooling on your cutting board.
My steak always gets a grey band; how can I fix this?
A grey band usually indicates uneven cooking, often because the steak was cooked cold or at too low a temperature for too long. To fix this, ensure your steak is at room temperature before cooking, use a screaming hot pan for a quick, hard sear, and consider a reverse-sear method for thicker cuts to achieve more edge-to-edge pinkness.
How do I know when my steak is done without cutting into it?
The only reliable way to know when your steak is done without cutting into it is by using an instant-read meat thermometer. Insert the thermometer into the thickest part of the steak, avoiding bone. Refer to a temperature guide for your desired doneness (e.g., 130-135°F for medium-rare), remembering to pull the steak a few degrees before the target due to carryover cooking.
Is buying expensive steak worth it for home cooking?
While you can make a good steak from less expensive cuts, investing in higher-quality beef (like USDA Prime or Choice) is often worth it for home cooking if you're aiming for a truly exceptional experience. The superior marbling and tenderness of premium cuts significantly contribute to flavor and texture, making the effort of how to cook perfect steak at home even more rewarding.
What's the difference between pan-searing and reverse searing?
Pan-searing involves cooking the steak entirely on high heat in a pan, aiming for a quick crust and then finishing to temperature. Reverse searing starts with cooking the steak slowly in a low oven until it's almost at the desired internal temperature, then finishing with a very quick, high-heat sear in a pan. Reverse searing is excellent for thicker steaks as it promotes more even doneness throughout.
Who should follow this guide on how to cook perfect steak at home?
This guide is for anyone who loves steak and wants to consistently achieve restaurant-quality results in their own kitchen. Whether you're a beginner looking for clear instructions or an experienced home cook aiming to refine your technique, the detailed steps and tips provided will elevate your steak-cooking game.
Is it safe to eat medium-rare steak?
Yes, it is generally safe to eat medium-rare steak. The primary concern with undercooked meat is bacteria, which typically reside on the surface of whole cuts of beef. A proper high-heat sear effectively kills these surface bacteria. For ground beef, however, it's recommended to cook to a higher temperature (well-done) as bacteria can be mixed throughout.
Will sous vide replace traditional methods for cooking steak?
While sous vide is a fantastic method for achieving incredibly precise and even doneness, it's unlikely to fully replace traditional methods like pan-searing or grilling. Each method offers unique flavor and texture profiles. Sous vide requires a final sear for crust development, essentially combining methods. Traditional searing provides a direct high-heat crust that many steak lovers prefer, offering distinct culinary experiences.
Ready to impress yourself and your guests? Now that you know how to cook perfect steak at home, armed with these expert techniques, your next steak dinner will be nothing short of spectacular. Grab your best cut, fire up that pan, and savor the perfection you've created.

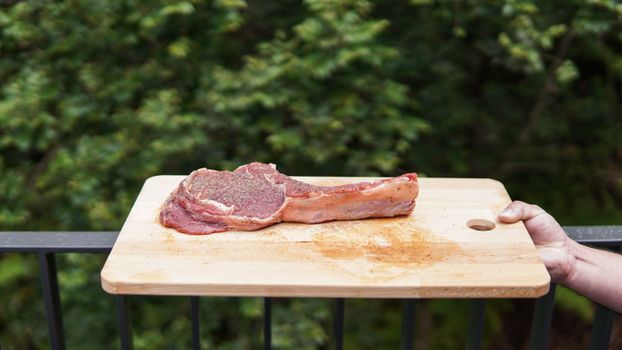 Photo: Anna Guerrero / Pexels
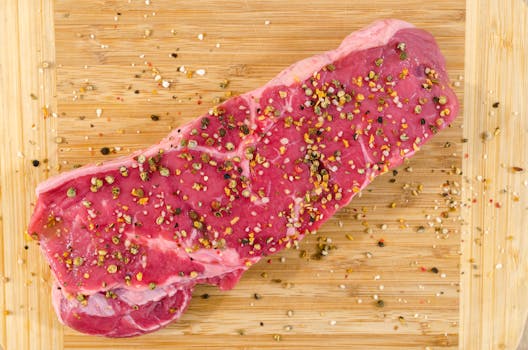 Photo: Lukas Blazek / Pexels
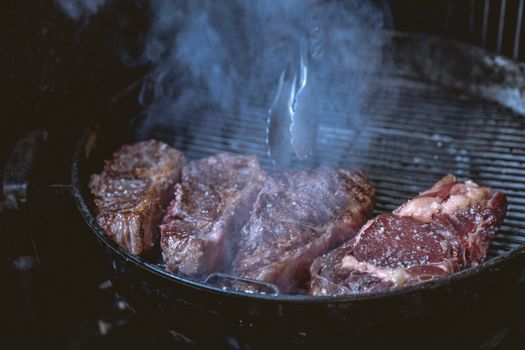 Photo: Los Muertos Crew / Pexels
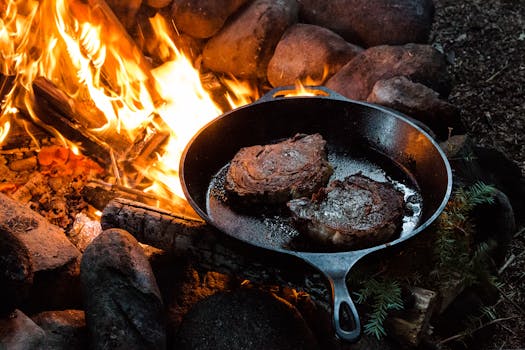 Photo: Loren Castillo / Pexels